
How to Adjust Acoustic Guitar Saddle Thickness
Adjusting acoustic guitar saddle thickness might seem easy, but because there’s so little to grip on to with your fingers, proves difficult for many. Try the below steps using painter tape to make this task easier.
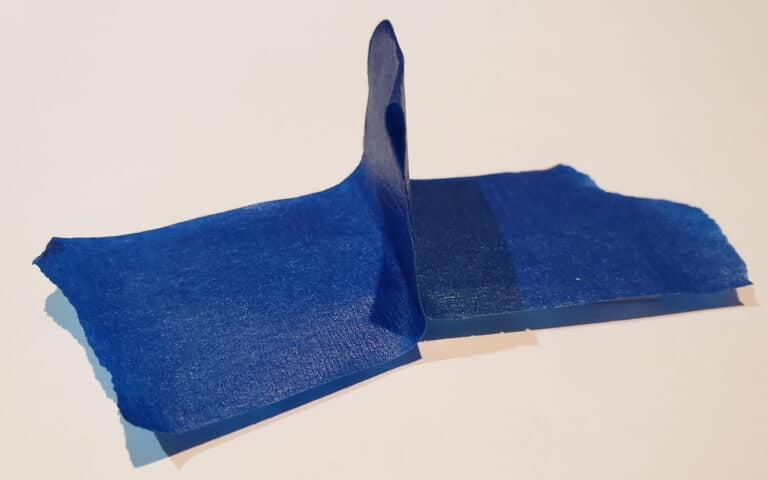
Step One: Fold Painter’s Tape
Use painter’s tape, not masking tape. Painter’s tape has a low tack and is easier to remove and less likely to leave behind residue on your saddle. Cut a piece of painter’s tape to about four inches long. Fold about one inch in the center as shown in the below picture. The center section will serve as a handle for you to grip with your fingers.
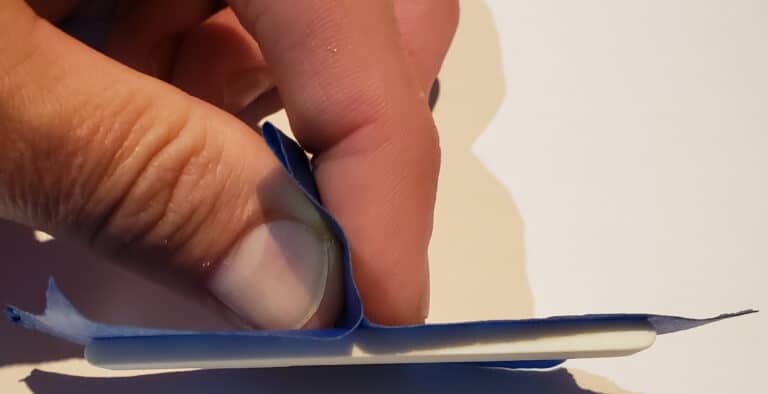
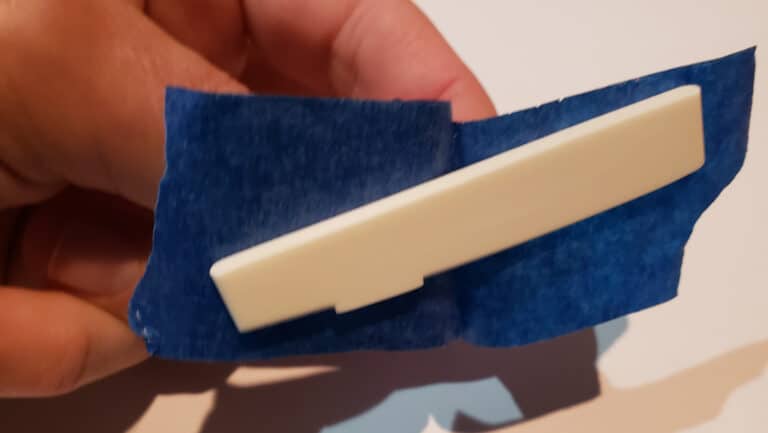
Step Two – Press Firmly on Saddle
Grip on to the handle with your index finger, middle finger and thumb. Push the tape down on your saddle for several seconds. Pat down all along the saddle so that the tape grips the saddle’s entire side. You should be able to lift up and see the saddle firmly secured on the other side as in the below pictures.
Step Three – Sand Saddle with Regular Rotations
Push your tape/saddle combo directly down on a piece of 120 grit sandpaper that’s on a flat surface. Push down firmly but not too hard. Move the saddle back and forth on the sandpaper a few times, as well as clockwise and then counterclockwise a few times. Then rotate the tape/saddle combo so that your thumb is on the other side of the handle, then sand again moving back and forth a few times, then clockwise/counterclockwise a few times. You will then flip the saddle on the tape, repeating Step Two, so that you can sand the other side of the saddle. Sand again on the other side, moving back and forth, clockwise/counterclockwise, then rotate the handle and sand again.
This is a slow and tedious process, but the regular rotations help you to obtain a uniform thickness. Your downward finger pressure will vary and so this rotation process is necessary. By not following the rotation process, your saddle will quickly develop a lop-sided thickness and will then not fit snugly in your bridge slot, which will produce poor tone, and if the saddle leans forward, could negatively affect intonation.
After you have done one full cycle of the above rotation process, check your saddle in the bridge slot. Keep repeating this cycle until your saddle fits snugly, but not tightly. Your saddle should not lean forward. See our article on How to Remove a Tight Fitting Saddle if you get a tight fit. You should sand both sides of the saddle.
Typically, the above process takes about 15 minutes to remove 0.1 mm of thickness. This process is effective for removal of up to around 0.3 mm thickness. Attempting to remove more than 0.3 mm is impractical as it will take significant time. If you have a saddle that’s more than 0.3 mm thicker than your saddle slot is, we advise that you get a new saddle that’s within 0.3 mm of your bridge slot thickness, or take your guitar to a professional guitar technician.
You might be tempted to try to use some common power tools to speed up this process. We advise against this. The only power tools that will work for such small pieces and for such precise work are specialty luthier or model tools. See Byrnes Model Machines Thickness Sander or Luthier’s Friend Sanding Station. Another option is the use of a CNC machine. However, please note that even if you have these tools, it takes significant time to set these up properly to remove the amount of thickness desired, and you will typically need several test runs before dialing in the process correctly. These specialty tools are only useful for those doing repetitive production work.
Common belt or disc sanders will move too quickly and result in an uneven thickness, as well as carrying a high risk of injury to your fingers. Taping your saddle to a board and then attempting to saw the thickness with either a band saw or table saw will result in a jagged cut and uneven thickness. Trying to use a Dremel sanding drum will quickly dig into your saddle and result in an uneven thickness and ruin your saddle.
Next Up: How to Adjust Saddle Height on One Side More than the Other
Disclaimer: The guitar technical information on this site is provided for general information and educational purposes only and is not a substitute for professional guitar repair advice. The use or reliance of any information contained within this site is solely at your own risk. Always take personal safety precautions, including the use of a dust mask, ear protection, and eye protection.