
How to Adjust Saddle Height on One Side More than the Other
To determine the correct saddle for your acoustic guitar requires five key measurements: length, height, thickness, top radius, and compensation pattern. However, we advise that you also measure your bass/treble edge height difference as steel-string saddles will typically have a taller bass edge. Saddles from the factory often have a bass/treble edge height difference of around 1 to 1.2 mm, although Martin guitar saddles are often about 2 mm.
When your guitar was set up, either initially at the factory or later, a technician may have increased or decreased the bass/treble edge height difference. As a result, when you receive a new saddle, you may find that one side needs to be reduced more than the other side does.
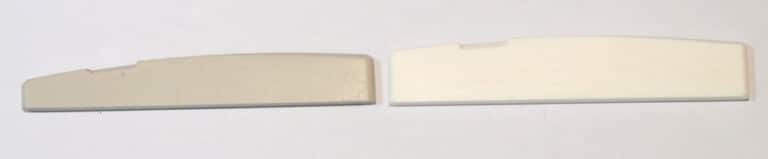
For example, in the picture below, to match a Breedlove Atlas Series plastic saddle, our bone saddle not only needs the overall height reduced, but also needs the treble side reduced more than the bass side.
Please note that the Breedlove factory plastic saddle would have originally been the same size as the bone saddle on the right, but was adjusted either at the factory or later. New saddle blanks are typically made larger to allow for adjustment to each individual guitar.
If this is the case with your saddle, then your saddle height was likely adjusted at some point to produce a lower action height for the treble strings. As such, if you wish to get the same action with your new saddle, then you will need to take more off the treble side saddle when adjusting. You can do this using just sandpaper, a ruler, and a good deal of patience. Below are the steps.
Match Saddle Tops and Draw Line
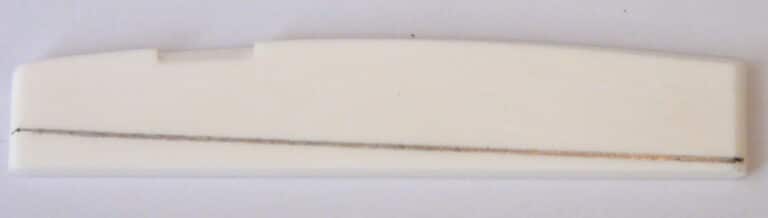
The first step is to place your old saddle on your new saddle. Match the saddle top radius. Use a pencil to draw a line on your new saddle where your old saddle’s bottom appears.
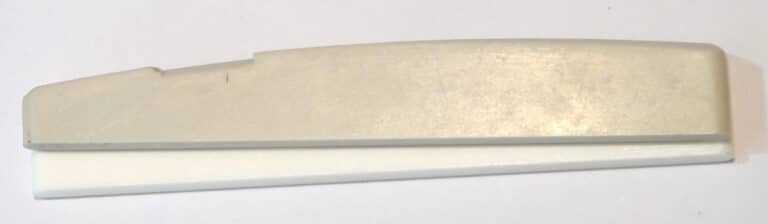
Next, use a pencil to draw a line on your new saddle where your old saddle’s bottom appears.
Sand More of One Side
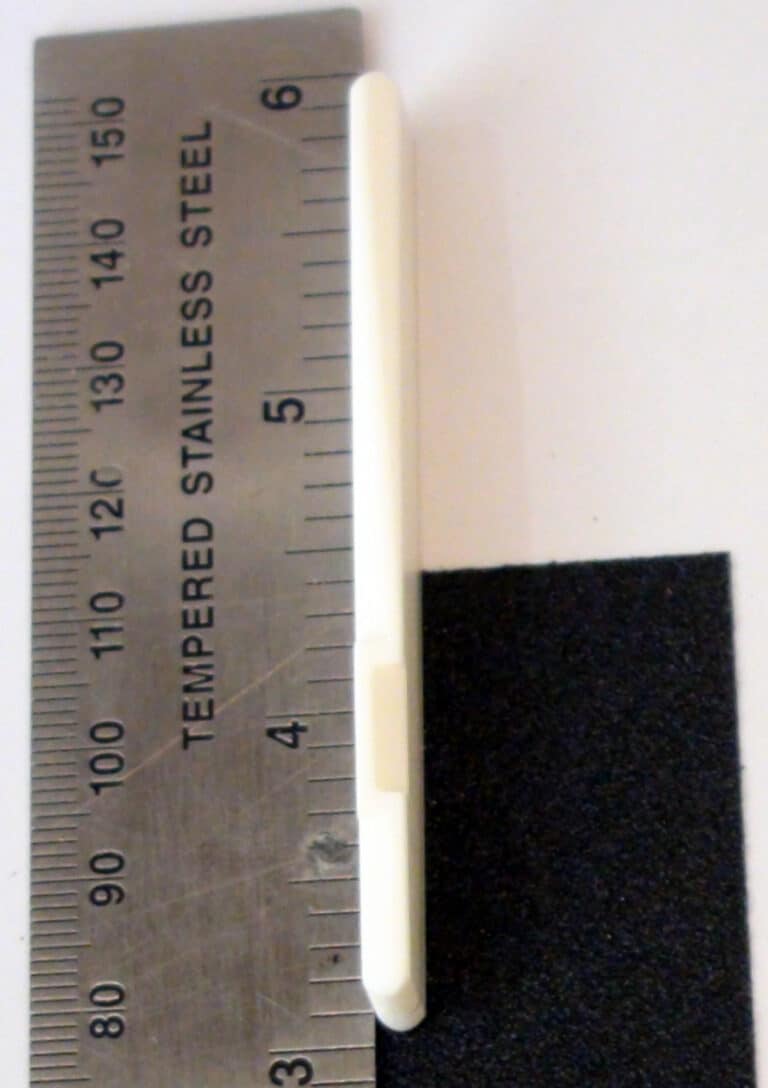
Once you have the line drawn, place a piece of sandpaper on a flat surface. On top of the sandpaper, place a straight edge, such as a ruler. Place the saddle on top of the sandpaper flush against the straight edge. Only place the treble side on the sandpaper. Do fifteen strokes on the treble half, then five strokes with the whole saddle to keep the bottom flat.

Flip Saddle
Flip the saddle 180 degrees, then place it on the other side of the sandpaper, again with only the treble side on the sandpaper. Your downward finger pressure while sanding will vary, and so flipping the saddle regularly will help to obtain a flat bottom. Do 15 strokes again only on the treble side, then five strokes with the whole saddle to keep the bottom flat. Adjust the number of strokes as needed, then repeat the above process until the line is reached. This will take time and patience, but for most people should take about 30 to 60 minutes depending on how much material needs to be removed.
Other Methods
Vise
You can clamp the saddle in a metal vise just below the pencil line, then sand away most of the material. Use a sanding block to remove the bulk of the material on the vise, then do final sanding by hand with the method mentioned above as vises often are not flat.
Belt Sander
We advise that you do not use common power tools in saddle adjustments as these tools are not designed for precision work. Adjusting saddles via power tools requires specialty luthier or hobby tools to do properly. If you decide to use a common belt sander, then only do so to cut away the bulk of material, then do final sanding by hand. Go slowly as bone will cut more quickly than wood does. Do not attempt to use a belt sander to adjust thickness. Please see our guide on How to Adjust Guitar Saddle Thickness for tips on how to do this by hand.
Saw
We advise against cutting your bone saddle with a table saw, bandsaw, jigsaw, or any other type of common saw. This will result in an uneven and jagged cut, and likely take off more material than you would like. In our experience, to accurately cut small bone parts via saw requires a high precision desktop table saw using a 90T blade with a .5 mm kerf or thinner. Additionally, to dial the process in will require numerous passes and is thus only economical for luthiers or guitar technicians who wish to take the same amount of material off numerous saddles.
Related Article: What Acoustic Guitar Saddle Height Do I Need?
Disclaimer: The guitar technical information on this site is provided for general information and educational purposes only and is not a substitute for professional guitar repair advice. The use or reliance of any information contained within this site is solely at your own risk. Always take personal safety precautions, including the use of a dust mask, ear protection, and eye protection.