
How To Adjust Through Guitar Saddle With Pre-Finished Top
Much, if not all, of what you read online about installing through guitar saddles discusses adjusting through saddle wings to the bridge wings first, then making adjustments to the saddle top.
Through saddles are often installed at the factory by gluing the saddle into the bridge slot first, sanding both the saddle and bridge wings together until flush, then adjusting, profiling, and compensating the saddle top after the bridge has been installed on the guitar.
If you want to adjust the saddle height on an already installed through saddle, you must do so from the top because removing material from the bottom will result in the saddle wings that are no longer flush with the bridge wings.
This leads many to believe that the only way to install a through saddle is via this path – adjust saddle wings first, then adjust top.
However, you can purchase a through saddle with a radiused, profiled, and compensated top, and then adjust it to your guitar bridge. You can do so and obtain your desired action height, bass to treble height difference, and get the saddle and bridge wings flush. To do so, follow the steps outlined in this article.
Note that installing a through saddle via this method is not an easier or quicker path. This is simply a different path that some may prefer. This method will take around one to three hours to complete for those who already have significant experience installing through saddles. If it’s your first time installing a through saddle, plan to spend three to five hours.
Please note that removing and installing a through saddle is difficult, and for most guitar owners, you should take your guitar to a qualified guitar technician rather than attempting DIY.
Gather Supplies
- Painter’s tape
- Small ruler
- Mechanical pencil
- MusicNomad F-One Oil
- 180 and 400 grit sanding sticks
- Spindle sander with correct radius spindle. Note that spindles are often listed in diameter, rather than radius. As such, for a one inch radius, you will use a two inch diameter spindle.
- 120, 220, and 400 grit sandpaper
- Grade B or better granite surface plate
- Small piece of wood to make radius gauge
- Pliers
- Microfiber cloths
Obtain Replacement Saddle
There is no standard size for through saddles, even for the same builder or model. You will need to remove your existing saddle and measure first, then obtain a replacement that has a taller maximum height, taller edge heights, and shorter wing arc lengths. See our Guide to Acoustic Guitar Through Saddles for detailed steps.
Note that the through saddle blanks you find for sale online will look different from your current saddle, particularly if you have a cut through installation saddle with very low edge heights. For example, your current cut through installation saddle might look something like this out of the bridge:

Yet replacement through saddles sold online often look like this:

This occurs because replacement saddles need to have a taller maximum height and edge heights for you to adjust down to fit your individual guitar’s slot. Additionally, the wing arc lengths on through saddle blanks will typically be shorter to allow for adjustment. Your current saddle height, or goal saddle height, must have/be at least 6 mm to follow the method described in this article.
Place Microfiber Towels on Guitar Top
Place microfiber cloths on your guitar’s top, covering everything but the bridge. This will help protect the finish while you do the work.
Protect Bridge Slot
Perhaps a key reason so many love the through saddle appearance is the flush look of the bridge and saddle wings. This is often achieved at the factory by gluing a rectangular saddle blank in the bridge first, then fine sanding the bridge and saddle wings together, as with the factory Martin through saddle shown in the below image.

However, since your bridge is already on your guitar you won’t have this luxury. Instead, you will need to adjust the saddle’s wings to match the existing bridge wings. Doing this will require that you remove/replace the saddle in the slot much more frequently than you would with a saddle that does not go through the bridge. This frequent removal/replacement can result in a dinged bridge slot and/or saddle.
As such, you will need to take additional steps to protect the bridge saddle slot and saddle from small nicks and dings. Follow the below tips to help protect the bridge slot and saddle.
F-One Oil on Bridge (Unfinished Wood Bridges Only)
Conditioning your bridge beforehand, particularly along the saddle slot edges, will help to reduce dings. Use F-One Oil and view the How to Clean and Condition an Unfinished Bridge video.
If you have an undersaddle pickup ribbon, remove it from the saddle slot by reaching inside the guitar, pull the ribbon through the bridge pickup hole, and then cover the bridge pickup hole to ensure that the F-One oil does not get inside your guitar.
Pitfall to Avoid: Do not use lemon oil in place of F-One oil. Lemon oil works as a cleaner, but not as a conditioner.
Painter’s Tape on Bridge
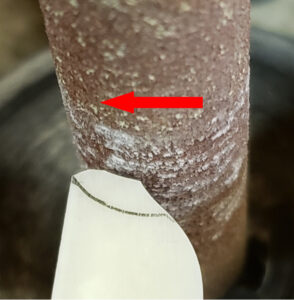
Cover up the sides and edges of your bridge saddle slot with painter’s tape as shown in the below image.

Smooth Saddle Bottom Edges
To help improve the saddle’s movement in and out of the slot, very lightly sand the saddle bottom’s edges with a 400 grit sanding stick. The goal is not to create a chamfer, but rather just to very subtly smooth the edges to allow for smoother movement in/out of the bridge slot.

Adjust Length/Thickness for Snug Fit
Adjust the saddle length and thickness using 120 grit sandpaper first to get the fit, then 220 grit sandpaper to smooth. The saddle should fit snugly, but not tightly. Do not try to force the saddle into the slot at any point as this can result in damage to the saddle and/or bridge slot. You should be able to remove it easily with your fingers. See our guides on Adjusting Saddle Thickness and Removing a Tight Fitting Saddle for more information.
Adjusting thickness for through saddles is more difficult because of the length. To make this process easier, use a grade B or better granite surface plate as your sanding surface to help you obtain consistent thickness.
Adjust Bass to Treble Height Difference via Saddle Bottom
See our Guide to Bass to Treble Height Difference. You can follow the same steps for a finished top through saddle. Note that your goal at this point is only to get the saddle’s bass to treble height difference set for action and playability purposes.
Pitfall to Avoid: Do not adjust the saddle wings at this point. You will get those flush with the bridge wings in the next step.
If your existing saddle is in good condition, use it as a template. If your existing saddle is broken or missing, then refer to the What if My Acoustic Guitar Is Missing the Saddle? Information at our article on acoustic guitar saddle height.
Mark Wing Material to Remove
Once you have the length, thickness, maximum height, and bass to treble height difference set, you will move on to the final part – getting the wings flush with the bridge.
Remove some of the painter’s tape so that the saddle wings and edges are visible, as well as the bridge pin holes.
Hold a small ruler perpendicular to the outside edge of the treble E bridge pin hole. Place a small piece of painter’s tape on your saddle to mark this section as in the below image. You do not need to have an exact spot – an approximation is fine.

Repeat this process for the bass side, marking the outside edge of the bass E bridge pin hole.
The purpose of this is to provide you with a marker for your maximum wing length. When you adjust your saddle wings on your spindle sander, you want to ensure that your wing length does not go too far and interfere with where your bass and treble E strings will sit.
It’s unlikely that you will exceed this mark, particularly with saddles longer than 100 mm, but it’s good to have a visual marker to ensure that your saddle wing lengths are not too long.
For bridges with a one-quarter inch saddle wing radius, your wings will be short and steep. See our Notes on Through Saddles for Martin Pyramid Bridges for more information.
Next, using your mechanical pencil, mark only the bridge wing radius on the saddle as shown in the below image. Do not extend the radius mark past the bridge wing radius as you will do this in another step.

Remove the saddle from the bridge slot.
At this point, you need to make a radius gauge with a small piece of scrap wood. We advise using a piece that’s about 90 mm long, 15 mm tall, and 4 mm thick – similar to that shown below.
Double check to ensure that you have the correct radius spindle installed – remember that spindles are typically listed in diameter, so if you need a one inch radius wing, then you would use a two inch diameter spindle. Use your spindle sander to cut one corner to the same radius as your bridge wing radius. The radius gauge should be sufficiently tall and long enough to mark the wing radius on your saddle. Your radius gauge should look similar to the below image:

Place your radius gauge on top of your saddle. Align with the bridge wing radius marks you made earlier as shown in the below image.

You will now extend the line as a guide for the section to remove, as in the below image.

Ensure that your saddle wing marks do not go past the maximum wing length marks that you made earlier.
Do this for both the bass and treble edges, and on both sides of the saddle. When you remove material with the spindle sander, you must hold the saddle so that the flat bottom faces away from the spindle’s rotation direction for smooth cutting, as in the below image.
Use Spindle Sander
You will now use your spindle sander to adjust your saddle wing radius. Cut the wing radius to the pencil lines, but not past. The most common error with through saddles is going too far with the spindle sander and rendering a saddle useless for your specific bridge. Leaving the pencil line mark sections for hand sanding will help you to avoid this error.
Pitfalls to Avoid: Do not try to use a different sized spindle or a Dremel tool, which will produce an inconsistent radius. Do not use any kind of saw as this will result in jagged edges. Do not try to sand the saddle while in the bridge. Do not try to sand the bridge and saddle wings together as this will result in a poorly sanded bridge.
Wing Arc Length Difference
Note that your bass and treble saddle wing arc lengths will likely differ. Your saddle out of the bridge will likely look somewhat lopsided, with a bass wing arc longer than the treble wing arc, something such as this for a cut through installation:
Or something such as this for a routed through installation:

This wing arc length difference occurs for a variety of reasons depending on the guitar builder, but notably Martin bridges are often around one mm thicker on the bass side than on the treble, although this will vary. Additionally, Martin cut through saddles slots are made with the bass slot higher than the treble. Please see the below links for more information.
Frets.com – Making a Martin Bridge
UMGF – 1935 Martin Bridge Discussion
Furthermore, your saddle’s bass to treble height difference is likely around 1 to 2 mm. We build in a 1.5 mm bass to treble height difference for our through saddles in anticipation of this.
Let’s look at some images to illustrate this.
The below image shows the specs for one of our through saddles from our CAD software. Note that the bass to treble height difference is 1.5 mm.

The wing arc length for the bass wing is a touch above 10.8 mm.

However, the treble wing arc length is a bit above 9.2 mm.

Hand Sanding
To ensure that your spindle sander does not take off too much material, you will now finish sanding by hand. Use a 180 grit sanding stick and slowly remove material. Keep the sanding stick perpendicular to the wing as in the below picture.

Check your work frequently by placing back into the saddle slot and checking how your saddle wing radius aligns with your bridge wing radius. Finish when the two are flush. Do light sanding on the saddle wings with a 400 grit sanding stick to smooth the wings.
You may see others who advise doing this process with a razor blade instead of sanding sticks. Although using a razor blade will work, we advise sanding sticks instead, which provide greater control over how much material is removed.
Pitfall to Avoid: Do not remove the spindle from your spindle sander and try to do final sanding with it. The spindle is too large and heavy and can result in uneven wing surface.
You are now essentially finished, although your saddle might be a bit grimy from all the handing. Lightly sand the saddle top and sides with 400 grit sandpaper to clean off any remaining pencil marks and grime.
Which Through Saddle For Your Guitar?
Still wondering which through saddle your acoustic guitar needs? Please contact us with all of the below.
• Guitar Year, Model, Series
• Current Saddle Total Length, Top Length, Top Radius, Maximum Height, Bass to Treble Height Difference, Thickness
• Guitar Saddle Slot Length, Thickness (if different from saddle specs)
• Wing Radius
• Edge Height for both Bass and Treble Edges
• Installation Method
• Current Saddle Compensation Pattern (please send a picture if you are not sure what type you have)
• String spacing at the bridge
We will respond within 48 hours.
Disclaimer: The guitar technical information on this site is provided for general information and educational purposes only and is not a substitute for professional guitar repair advice. The use or reliance of any information contained within this site is solely at your own risk. Always take personal safety precautions, including the use of a dust mask, ear protection, and eye protection.